| Buyer's Guide | |||||||||||||||||||||||||||||||||||||||||
Lavi "Beltrac" Partition Posts and PanelsBUY - Order Lavi Industries Partition Posts and Panels HereThis product is available in two finishes for the frame: Matte Black (MB) and Satin Aluminum (SA) 

Options for the frame insert are Clear Acrylic Panel (CL) and Black Sintra (BK). It can also be custom printed with your graphics. 

BUY - Order Lavi Industries Partition Posts and Panels Here |
|||||||||||||||||||||||||||||||||||||||||
Lavi Belt Stanchion AccessoriesBUY - Order Lavi Industries Belt Stanchion Accessories HereThis page contains everything you need to know about Lavi Industries Beltrac accessories. Standard Aluminum
|
|||||||||||||||||||||||||||||||||||||||||
Lavi Beltrac Replacement PartsBUY - Order Lavi Industries Replacement Parts HereThis page contains everything you need to know about Lavi Industries' Beltrac replacement parts. Belt End Replacement Assembly InstructionsParts List: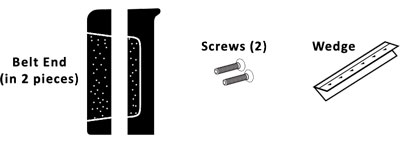
Required Tools:

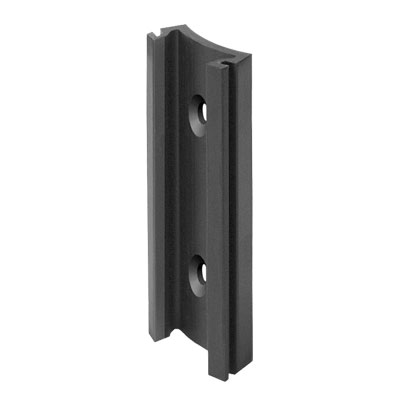
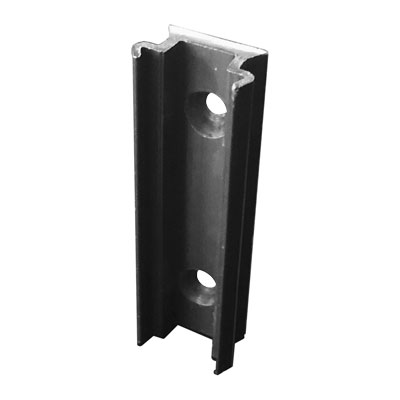
BEFORE YOU START: Examine your new plastic Belt End carefully. It will arrive disassembled in two pieces. Belt End "BACK": Has textured plastic that wraps around the back and a radius corner which should be oriented to "TOP". IMPORTANT: The top edge of the Belt Ribbon and the top of the Belt End must be oriented "top-to-top" throughout assembly or the newly assembled Belt End will not work properly. 1. Pull enough Belt Ribbon out from post to make a loose knot. This will keep it from irretrievably retracting and will make it easier to work with. Take note of the top edge of the Belt Ribbon [suggestion: paperclip]. Cut the old plastic Belt End off with scissors, taking care not to unravel the Belt Ribbon. 2. Thread the Belt Ribbon through the slot in the Belt End "BACK" from the side with the countersink holes. Double-check that the radius corner and the Belt Ribbon are oriented to "TOP". 3. Position Wedge in Crimping Tool: position the fold of the Wedge against the screws. Gently apply pressure with Crimping Tool to hold in place. Do not clamp. 4. Feed the Belt Ribbon into the Wedge. Make sure it is centered and fully seated to the back of the Wedge, then apply pressure with the Crimping Tool to securely clamp the Belt Ribbon into the Wedge. 5. Fold Ribbon/Wedge over and fit it snugly into the BACK piece of the plastic Belt End. Fit the FRONT piece of the plastic Belt End onto the BACK piece [there is only one way it will fit] and secure with screws. Untie knot and retract Belt. 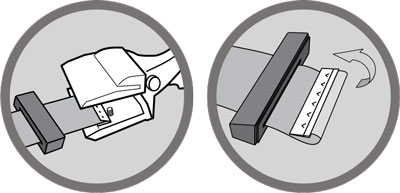
You can use any standard pliers or this special Belt End Crimper ToolBelt Mechanism Removal and InstallationDetermine what kind of mechanism you are replacing:Review the illustration below and determine if you have an "old" mechanism (prior to 2014) or a "new" mechanism (2014 or later). 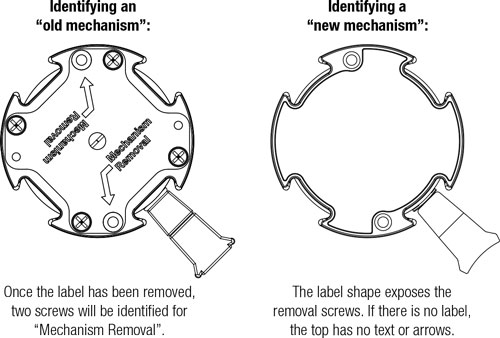
Removing an "old" mechanism:1. Remove the label. In older mechanisms, the label covers the screws that need to be removed in order to release the mechanism from the post. The label should peel off easily. 2. Remove the two Phillips head screws marked for "Mechanism Removal" noted by the arrows. Do not remove any of the other screws. Removal of the Spring/Belt screws could cause the tensioned spring to release, resulting in injury. (Figure A) 3. Lift Belt Mechanism straight up from the post. (Figure B) 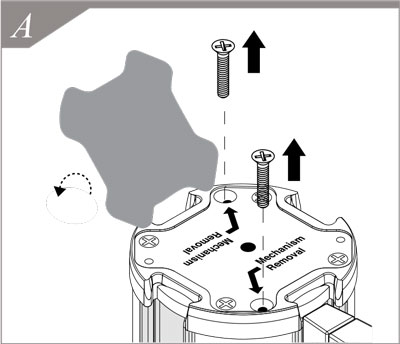
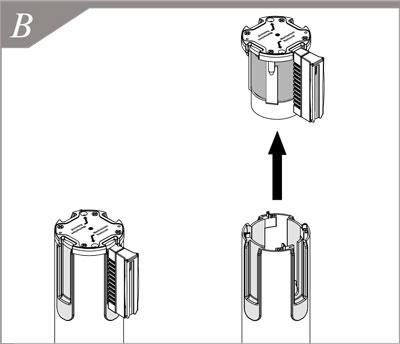
Removing a "new" mechanism:1. The label for new mechanisms does NOT cover the removal screws. They are clearly exposed so there is no need to remove the label. 2. Remove the two flat head screws. (Figure C) 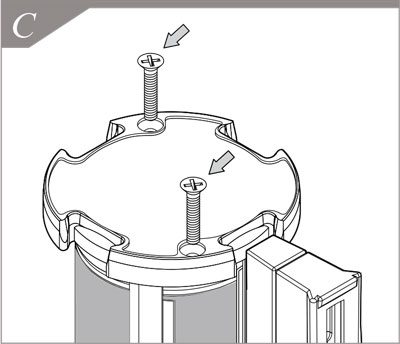
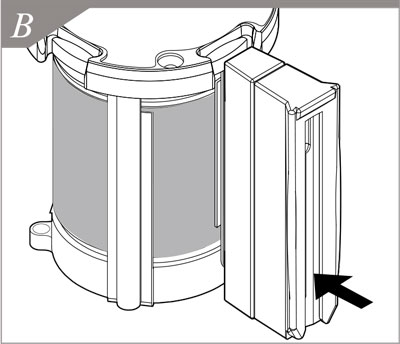
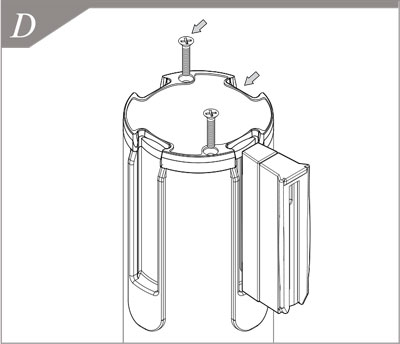
Mechanism Installation:1. Your new mechanism should arrive with the belt guide and belt end neatly tucked into proper position. If it has come loose, click the belt guide back into place. See Figure A to determine where the belt guide slots into the mechanism casing. Once they are clicked together, there is no need to pull the belt out, it is ready to slide into the post. (Figure B) 2. Align mechanism to post so the beltguide is lined up to the notch in post. 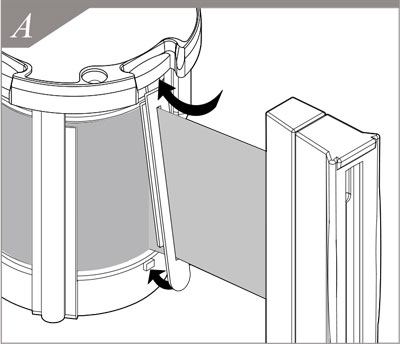
3. Drop in place, apply a small amount of pressure if needed. (Figure C) 4. Secure mechanism to post with (2) 6-32 x 3/4" pan head screws (provided) via the two exposed countersink holes in the cap. (Figure D) When properly secured, the screw heads will sit slightly below the cap surface. 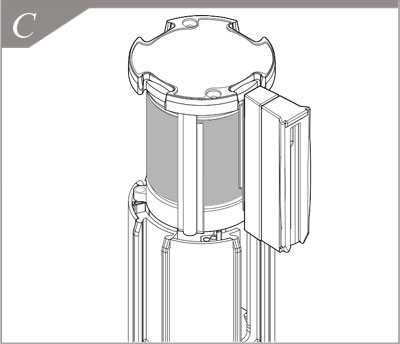
How to select a correct size accessory for Lavi Beltrac Stanchions 7’ or 13’ feet beltMost other major stanchion brands have the same diameter tube for 7’ and 13’ feet retractable belt barriers. Lavi Beltrac 3000 tube size is different. Before ordering a part, measure the belt length or use this method below to determine the size. You have to know this if you are ordering: Lavi Beltrac 30007 feet belt post diameter is 2 ¾ inches (6.98 cm)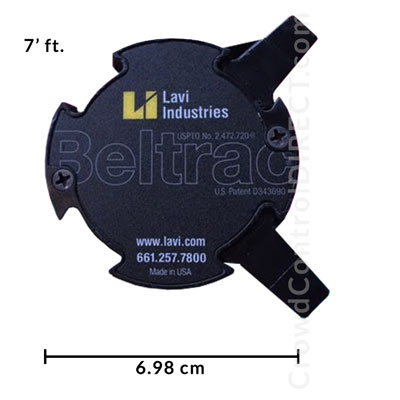 13 feet belt post diameter is 3 ¼ inches (8.25 cm)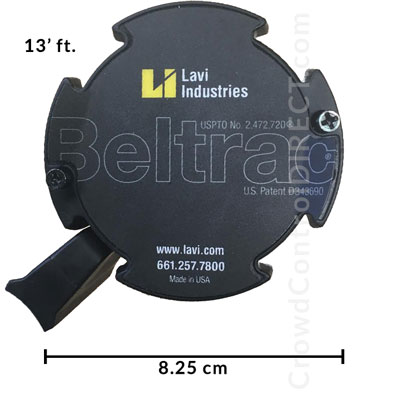 This is how the belt stanchion top measure with any credit card: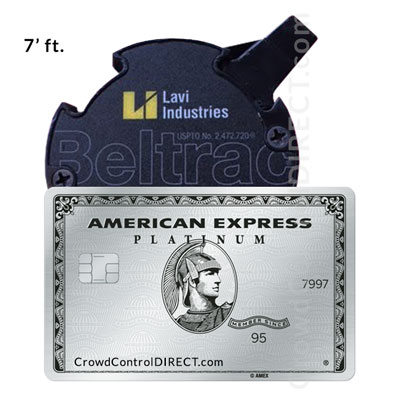 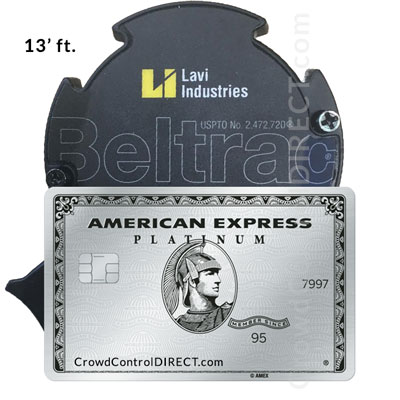 Old Design 7' ft.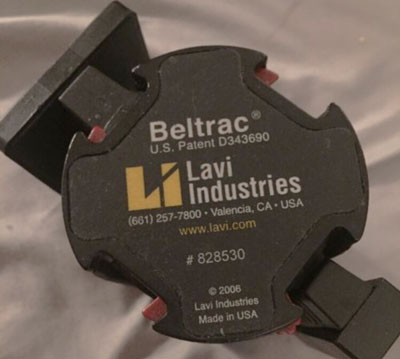 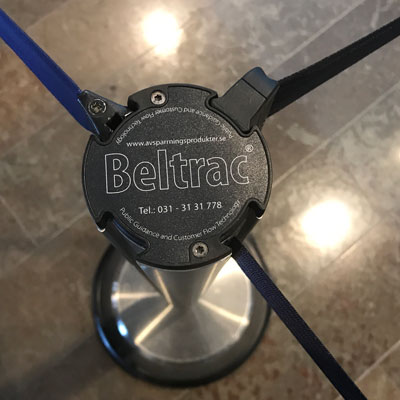 Old Design 12' ft.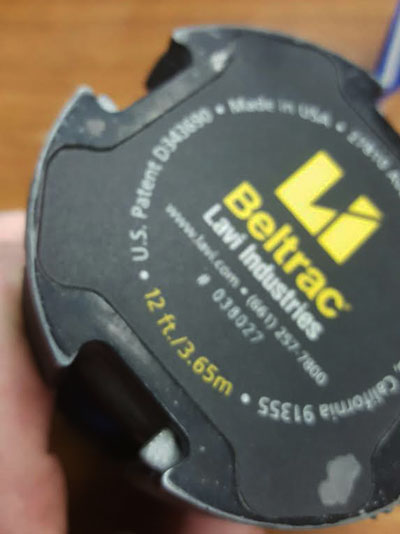 |
|||||||||||||||||||||||||||||||||||||||||
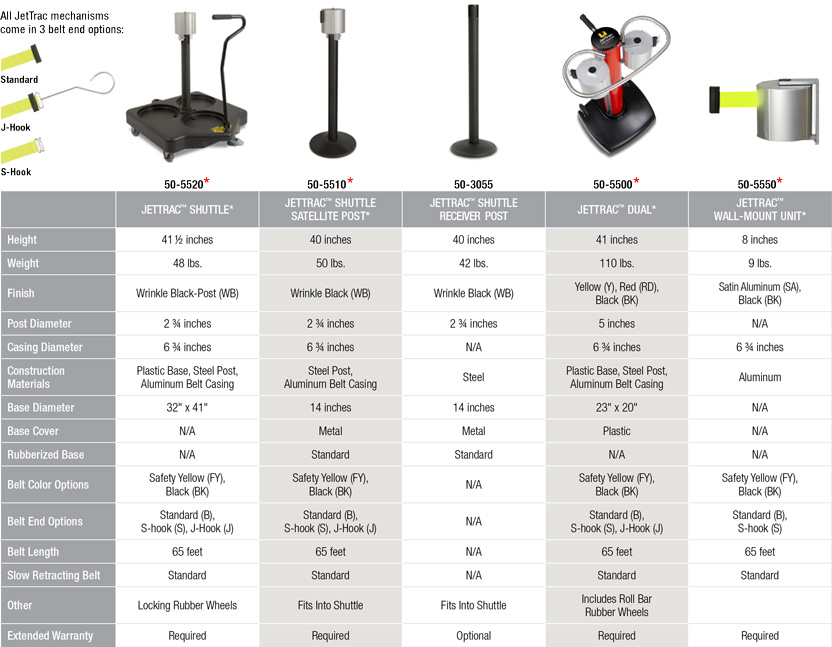
Lavi JetTrac Extra Long 65 ft. Belt BarrierBUY - Order Lavi Industries Extra Long Belt Barrier Here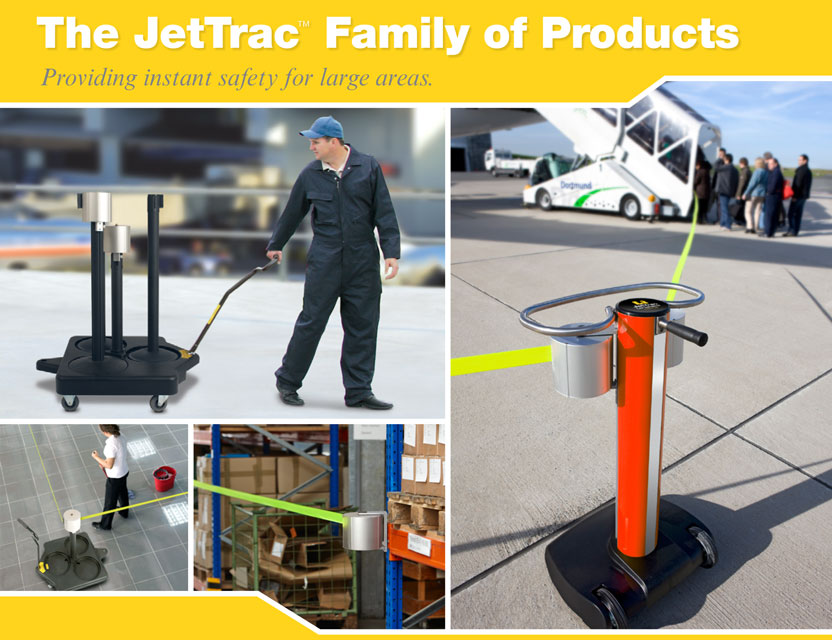
JetTrac Shuttle
JetTrac Dual
JetTrac Satellite Post and Receiver Post
JetTrac Wall-Mount
Belt End Options: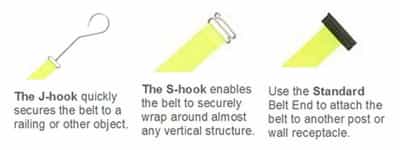
RESOURCES:SPEC SHEET: JetTrac Retractable Belt Safety Barriers USER GUIDE: JetTrac User Guide ASSEMBLY SHEET: JetTrac Belt Case ReplacementBUY - Order Lavi Industries Extra Long Belt Barrier Here |
|||||||||||||||||||||||||||||||||||||||||
Buyer's Guide for Expanding BarricadesWe sell 3 types of expanding barricades:VersaGuard

VersaGuard - made of steel and aluminum, made in the US. FlexMaster & FlexPro

FlexMaster & FlexPro - inexpensive, made of steel and aluminum and also plastic, made in China. Xpandit & Multi-Gate

Xpandit & Multi-Gate Expandable Plastic Barricades - Easy to handle and set-up, these portable plastic barriers can be quickly deployed by a single worker, and its lightweight design makes lifting it a breeze. VersaGuard Catalog
VG-1000 Yellow/Black "Versa-Guard" - E-X-P-A-N-D-I-N-G PORTABLE SAFETY BARRICADE VG-1010, VG-1030, VG-2030, VG-4030, VG-6030, VG-1050, VG-1065, VG-1070, S-0000, S-1010 |
|||||||||||||||||||||||||||||||||||||||||
FlexMaster Expandable Barricade Buyer's GuideFlexMaster 75Light & CompactFlexMaster 75 is a lightweight, water barricade made from impact resistant polyethylene. FlexMaster locks in position at the desired length and collapses down into its own frame so it can be carried like a toolbox. Featuring two battery operated warning lights and 52 reflective panels, FlexMaster is ideal for night use. Height: 38" Length Folded/Extended: 5"/7.5' Weight (Without Water): 16.5 lb Material: Polyethylene Order FlexMaster 75 Expanding Barricades Here 

FlexMaster 110Light DutyA polyethylene barricade that expands up to 11'5". Lightweight, non-rusting and easy to handle and store. Units can be linked together using a simple hook & loop connection system to create a run of any size. Height: 38" Length Folded/Extended: 16"/11.5' Weight (Without Water): 14 lb Material: Polyethylene Order FlexMaster 110 Expanding Barricades Here 

FlexPro 110Light & Heavy Weight OptionsWith a collapsed width of just 13" the FlexPro 110 model is highly portable and yet can be joined to other units to make a barrier of any length. Featuring a sturdy steel frame the FP110 is available with aluminium cross members at a weight of 19 lb or steel cross members at 26 lb. Height: 37" Length: 11.5' Weight: 19 lb / 26 lb Material: Steel or Steel/Aluminium Order FlexPro 110 Expanding Barricades Here 

FlexPro 16016' Length FlexProThis model has the same features as the FlexPro 110 but expands to a full 16' and is designed for creating long run barriers. Height: 37" Length: 16' Weight: 29 lb Material: Steel Order FlexPro 160 Expanding Barricades Here 

|
|||||||||||||||||||||||||||||||||||||||||
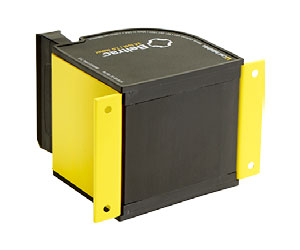
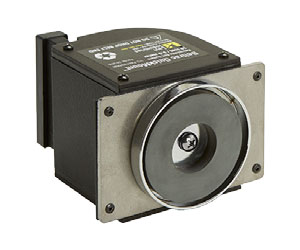
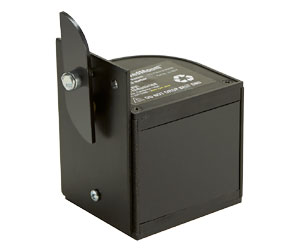
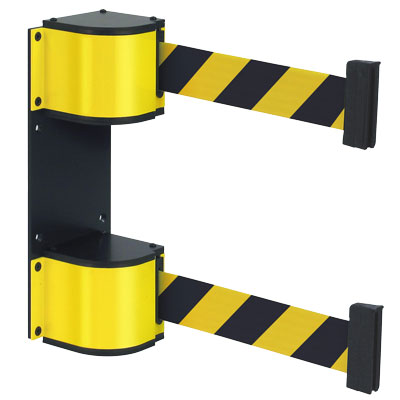
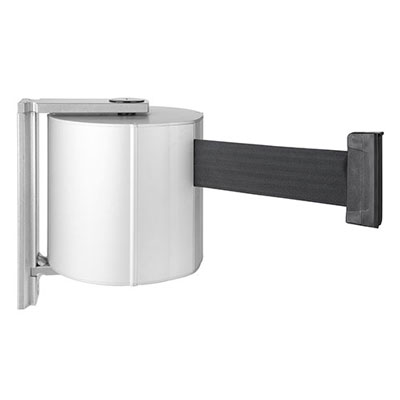
Lavi Wall-Mounted Retractable Belt BarriersBUY - Order Lavi Industries Wall-Mounted Belt Barriers Here7 and 13 Feet Belt Barriers
Features & Benefits:Ideal Solutions for Temporary Closures
Choice of Mounting Options
Specification:18 Feet Length or More
Six available mounting conditions provide a solution for any environment.Specification:Belt Ends: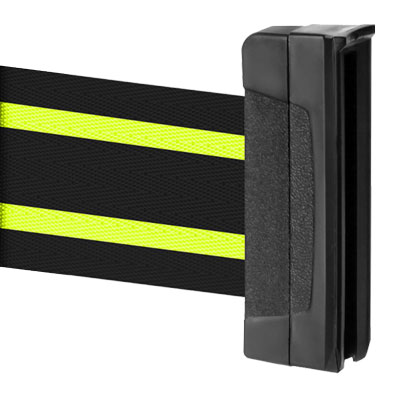
Standard belt end with receptacle (3011) 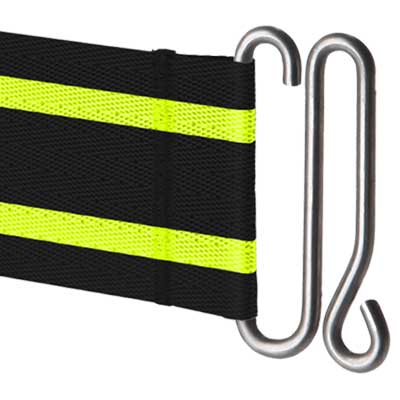
S-Hook belt end, no receptacle (S10) 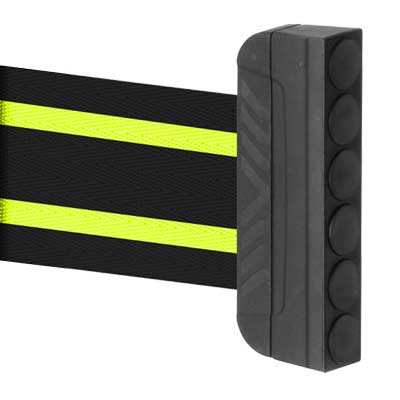
Magnetic belt end, no receptacle (MBE) Accessories:Lavi Industries wall mounted retractable belt barriers are the most durable in the market. Maximum retractable belt length:
Please click here if you need a longer belt wall mounted barrier or a barrier with another belt color, or a different mounting option.
BUY - Order Lavi Industries Wall-Mounted Belt Barriers Here |
|||||||||||||||||||||||||||||||||||||||||
Queue Solutions Retractable Belt Barrier Buyers GuideBUY - Order Queue Solutions Products Here |
|||||||||||||||||||||||||||||||||||||||||
Crowd Control Retractable Belt Barriers for Harsh Outdoor & Marine EnvironmentsBUY - Order Queue Solutions Products Here |
|||||||||||||||||||||||||||||||||||||||||
Buyer's Guide for Lavi Beltrac Stanchion Bases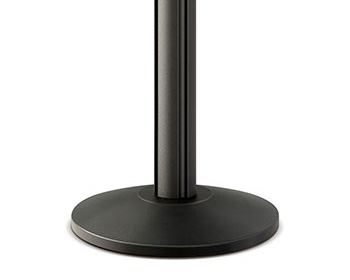
Sloped Base 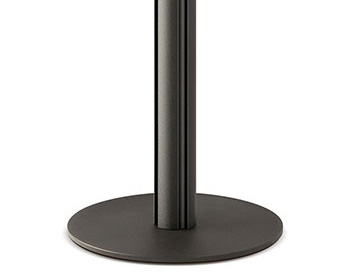
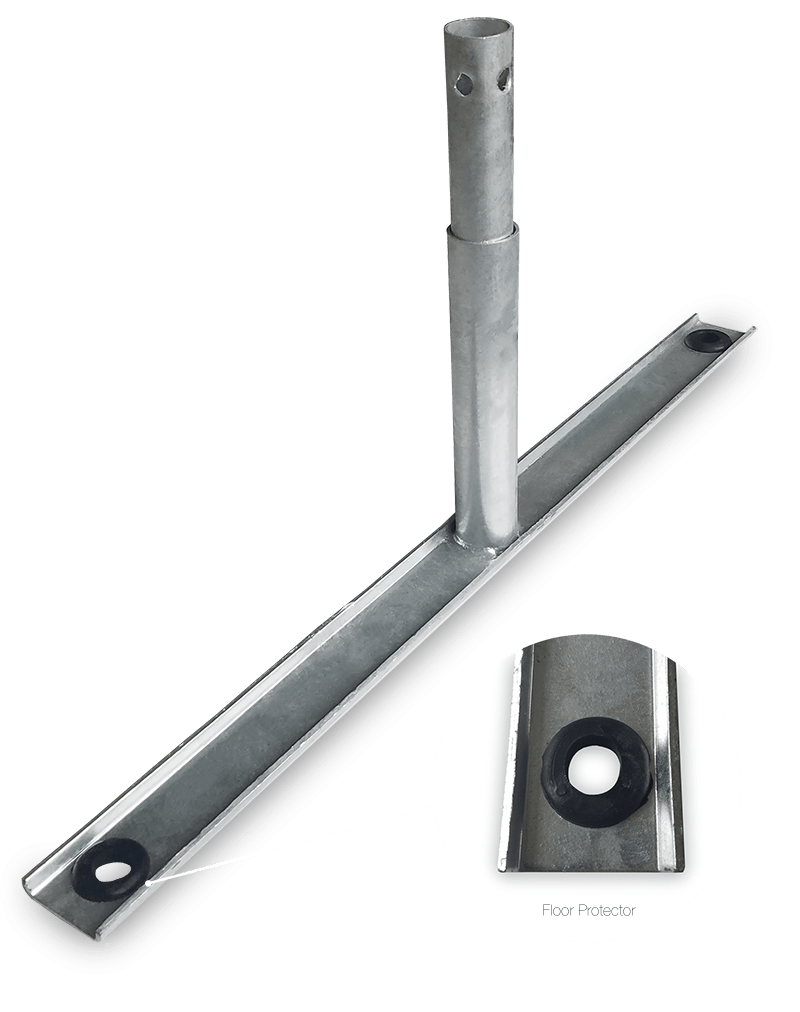
Slim Base Lavi stanchions with the new "Slim Base" must be shipped assembled, one stanchion in a 43x15x15 in. box, therefore the "shipping-dimensional weight" is double of the actual (30 lbs) product weight. For orders of 16 stanchions or less, the shipping cost will be relatively high, bigger than 16 stanchions orders are usually shipped by a truck on the pallet then shipping cost is based on weight which is the same whether it's shipped assembled or knocked-down. 
Heavy Sloped Base This base looks exactly the same as a regular sloped base but with an added weight to it. The total weight is 37 lbs. 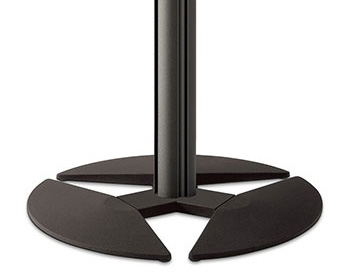
Tri-Base The Tri-Base is 34.5 lbs assembled with a 20" diameter. The Heavy and Tri-Base can be added to most Lavi Beltrac Stanchions. But we have to do it manually. Please ask for quote. Tri-Base Assembly Instruction1. Turn the Tri-Hub Center Piece with Wedge Insert upside down. Insert one Half Moon Base. See Figure A. 2. Insert and secure two PFH screws. See Figure B. 3. Insert the remaining two Half Moon Bases into the Tri-Hub Center Piece and secure them with PFH Screws. 4. Flip the fully-assembled Tri-Base so that the Wedge Insert is facing up. The Tri-Base is now ready to receive the post. See Figure C. 5. Slide the Post over the Wedge Insert and secure with Allen Wrench. See Figure D. 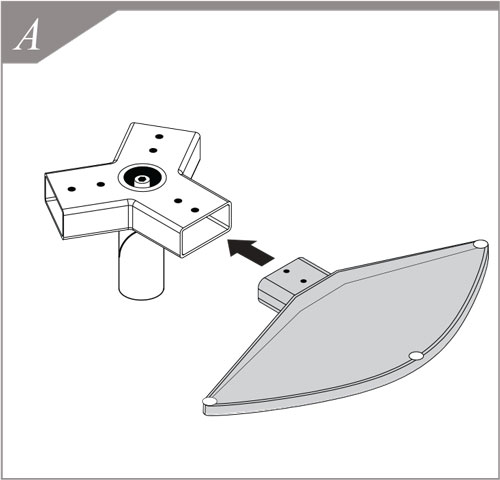


|
|||||||||||||||||||||||||||||||||||||||||
Buyer's Guide for Lavi Rope StanchionsBUY - Order Lavi Industries Rope Stanchions Here
Features & Benefits:Premium Design
Superior Construction
Ropes
Chains
Signage-Ready
Warranty

BUY - Order Lavi Industries Rope Stanchions Here |
|||||||||||||||||||||||||||||||||||||||||
Crowd Control Steel Barricade Buyer's GuideBUY - Order Crowd Control Steel Barricade HereBarricade Features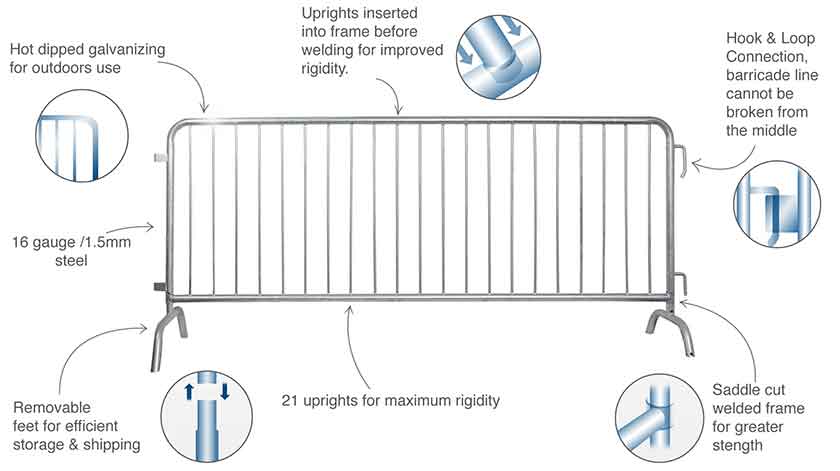
8' ft. Long Barricade
6.5' ft. Long Barricade
Color Options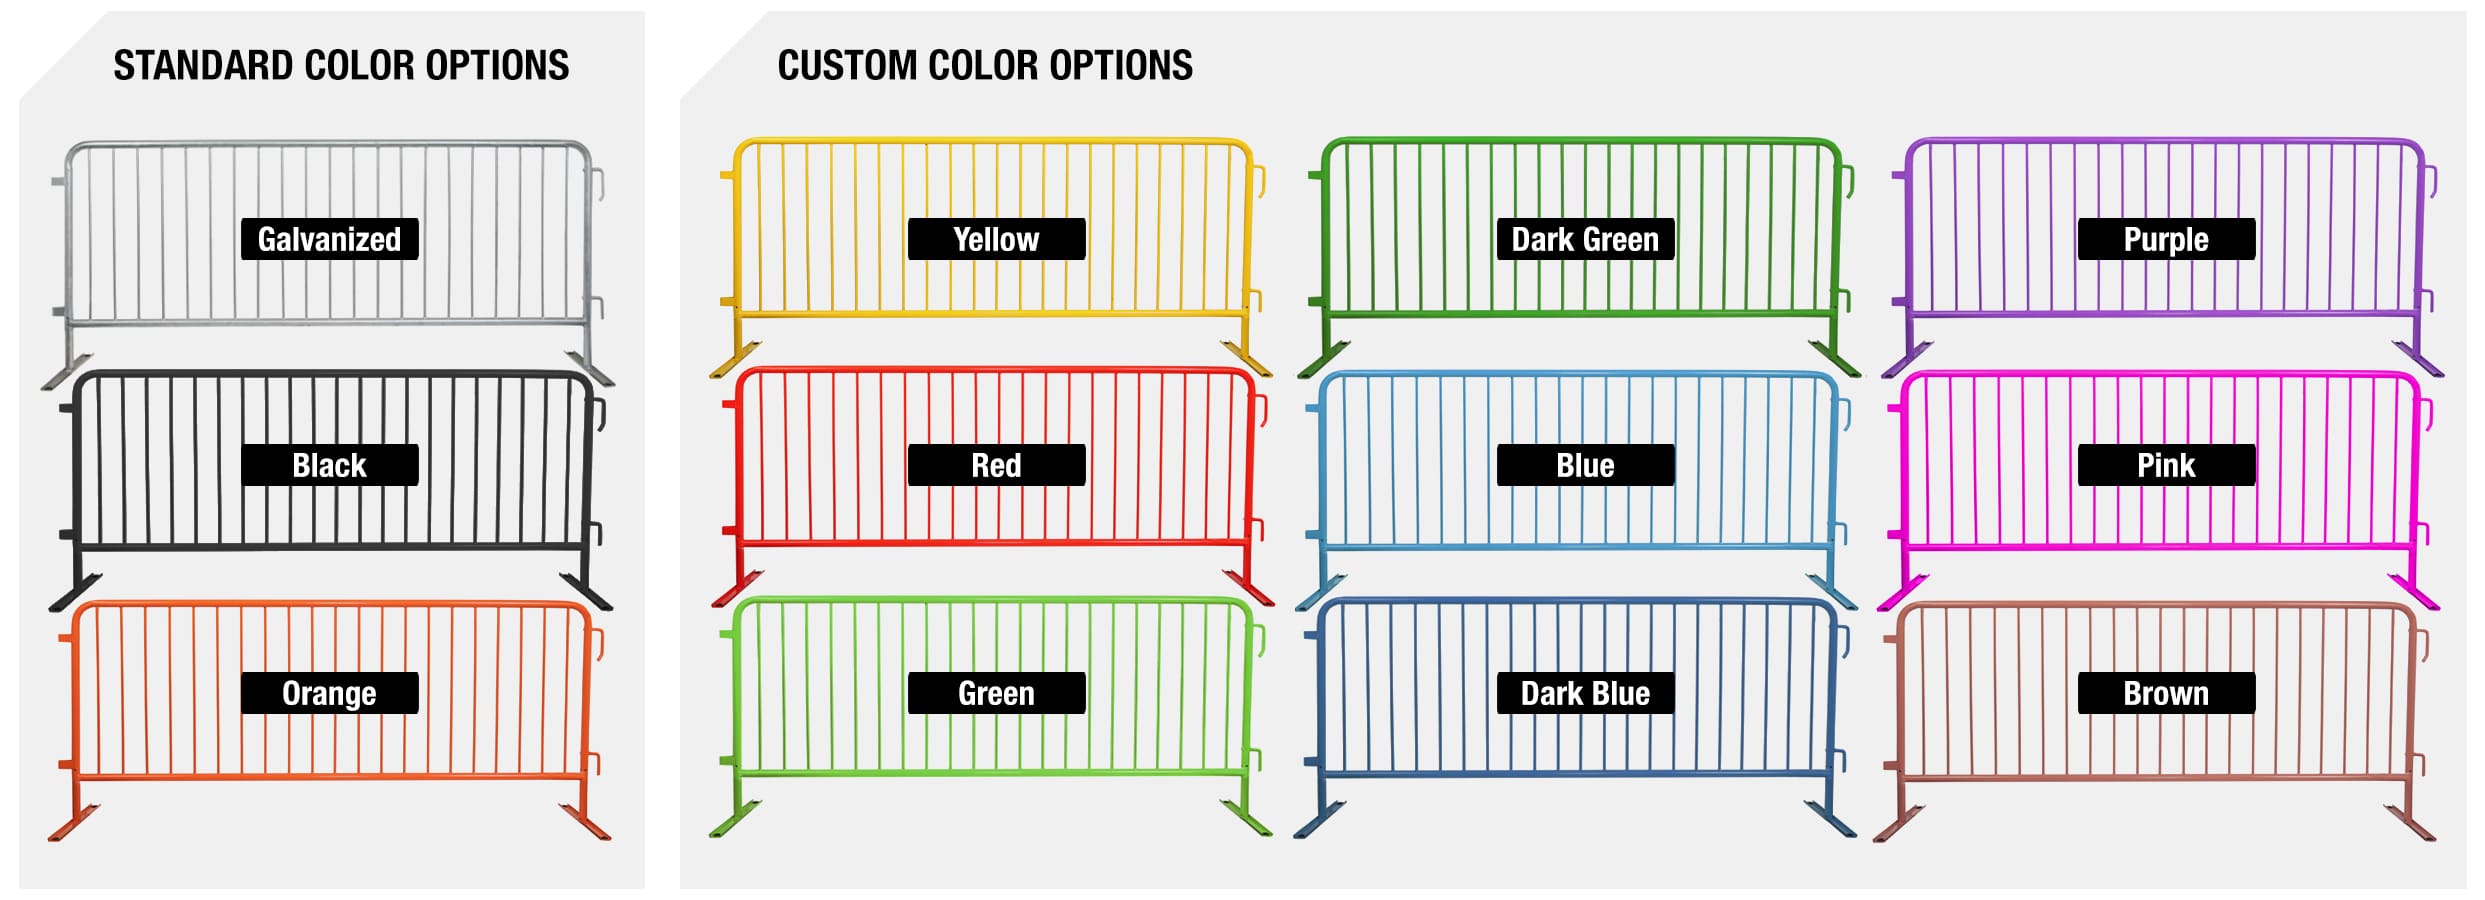
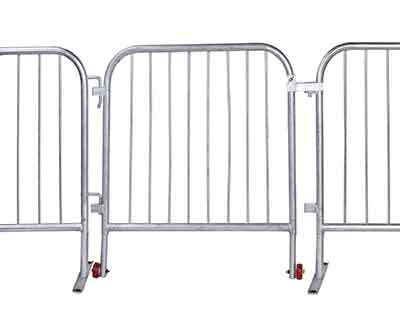
Barricade GatesBarricade Gate For Pedestrian Access
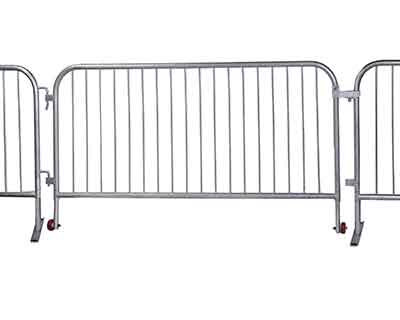
Barricade Gate For Vehicle Access
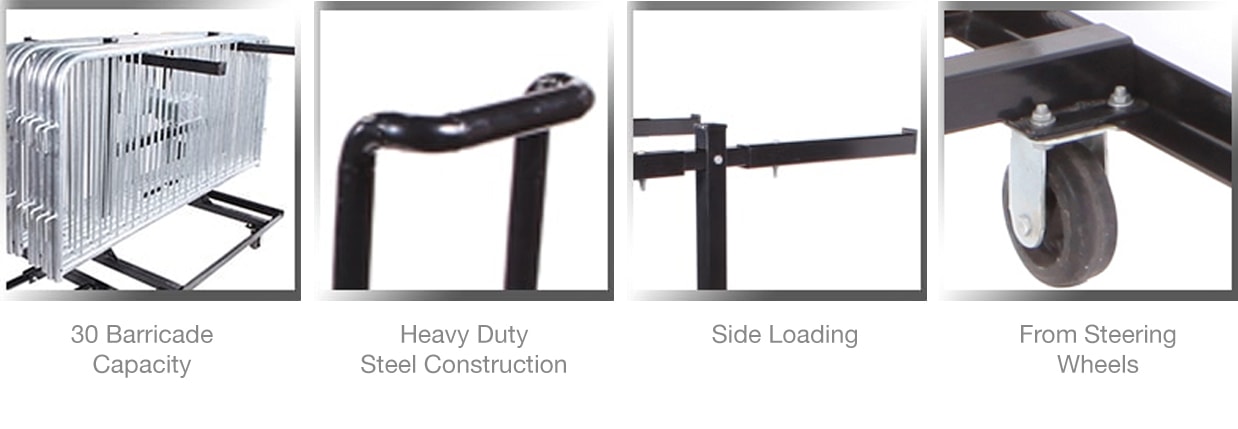
Feet OptionsJackets for Crowd Control BarricadeBillboard Sized Advertisements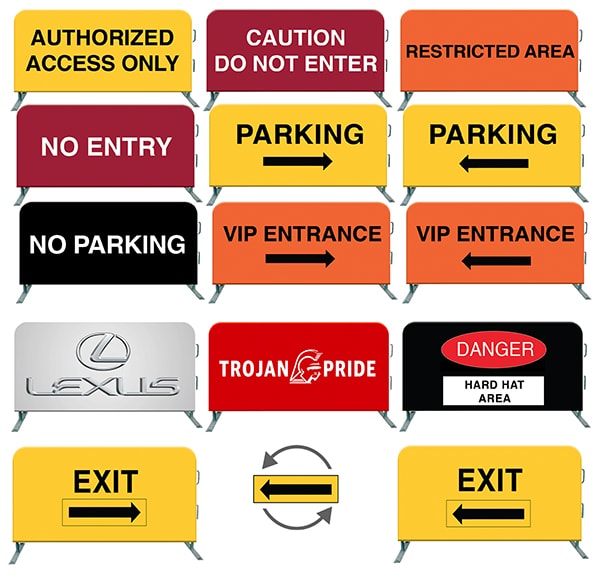 Barricade jackets provide a bill board sized opportunity to communicate advertising messages, safety notices, or directions. Available in 18 vinyl colors, jackets can be screen or digitally printed with our standard messages or virtually any custom message or logo. Barricade Carts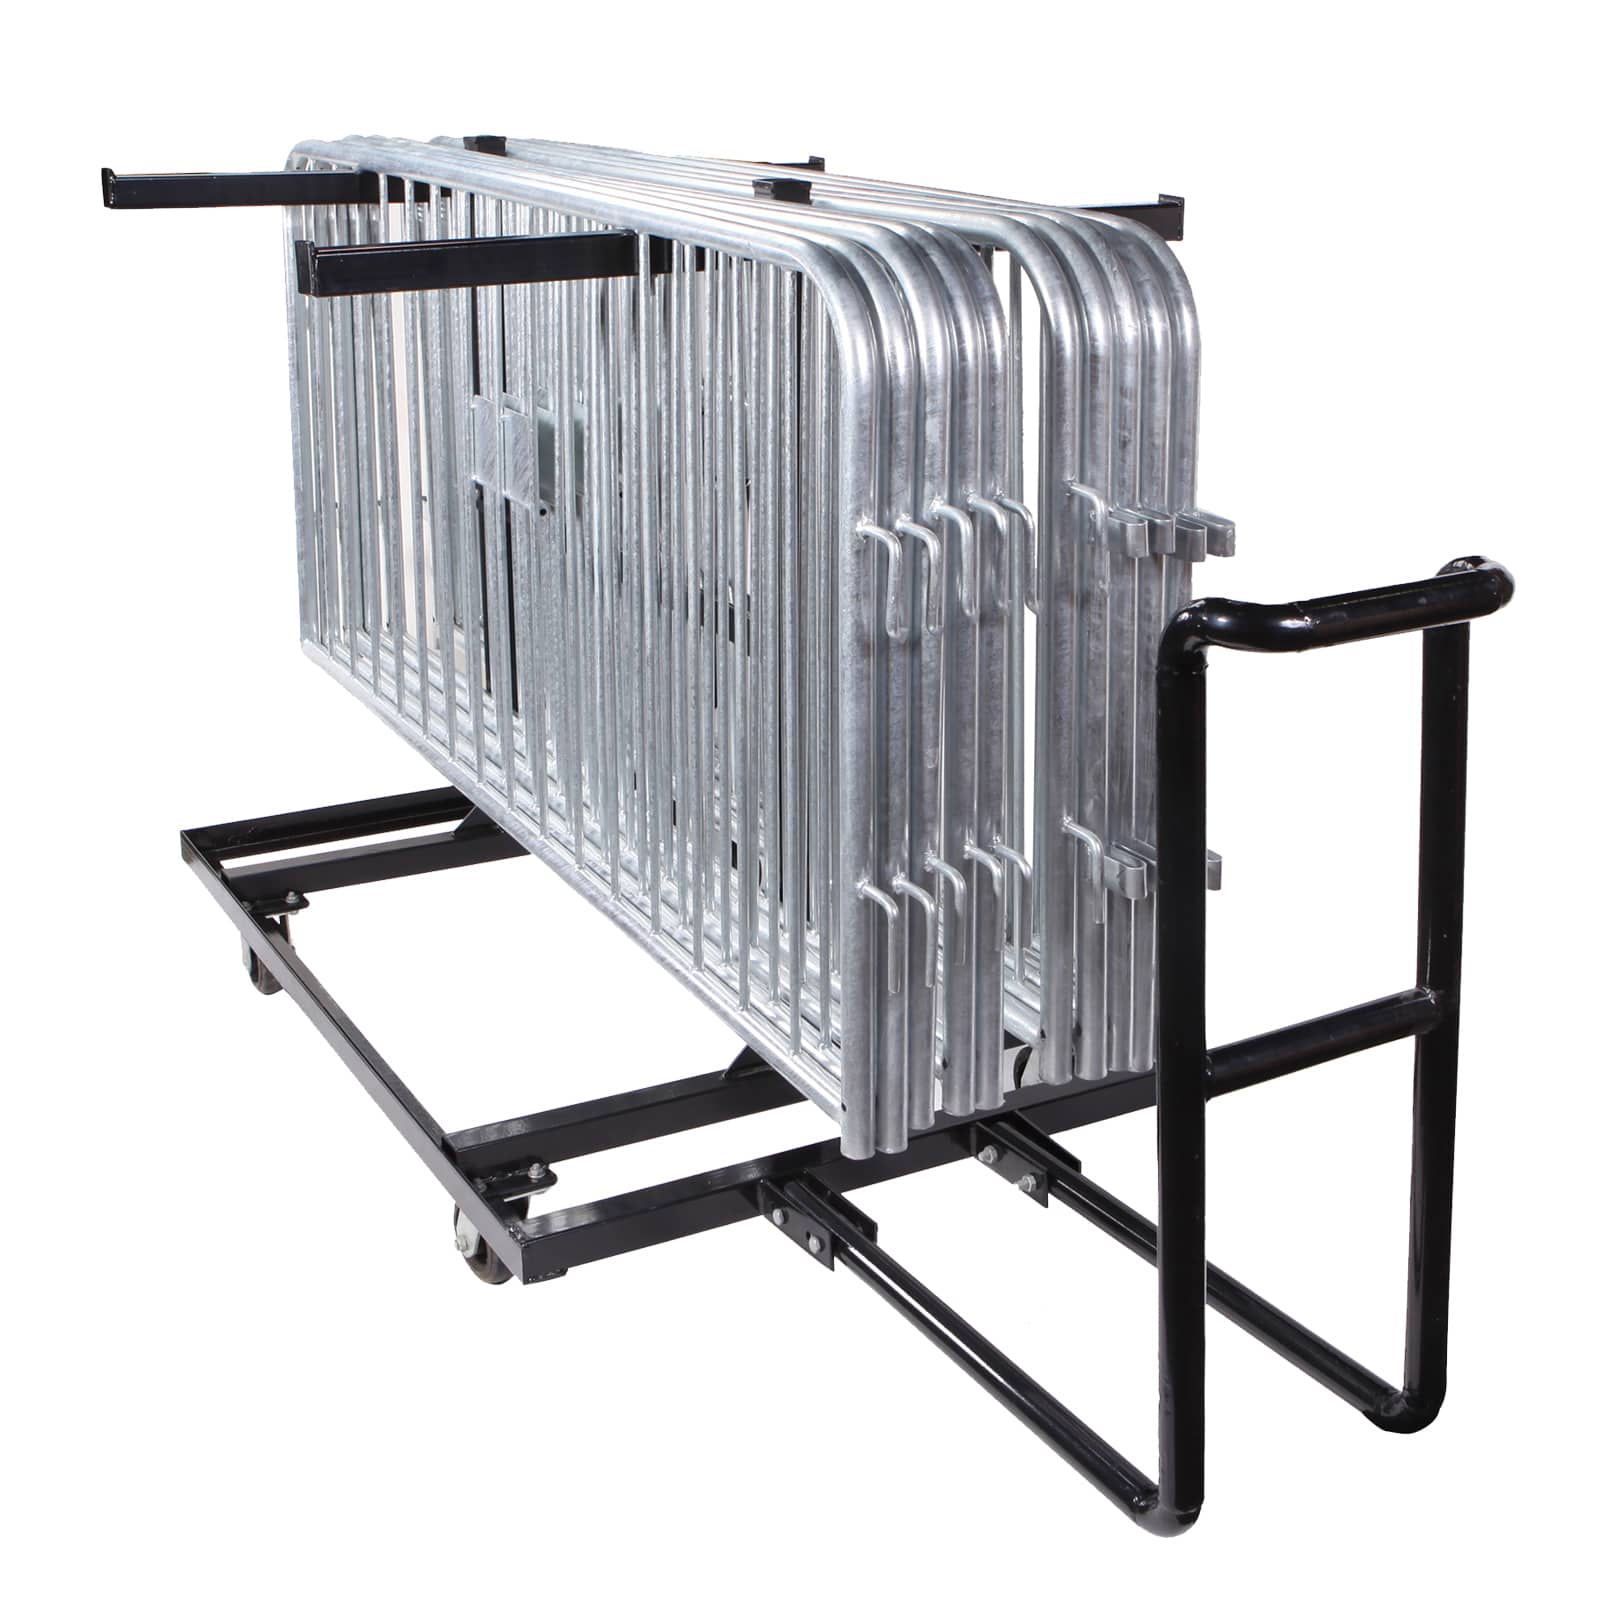
Easy Storage & Movement
 RESOURCES:SPEC SHEET: Crowd Control BarricadeBUY - Order Crowd Control Steel Barricade Here |
|||||||||||||||||||||||||||||||||||||||||
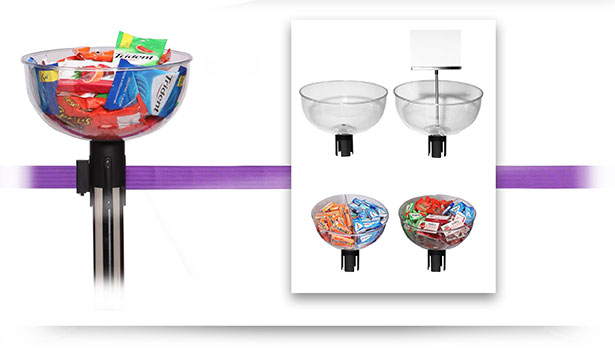
Queue Line Merchandising Buyer's GuideBUY - Order Queue Line Merchandising Panels & Display BowlsRevenue Generating Customer QueuesThe customer queue is the best impulse buy location in any retail store. Queuing customers are idle making them far more likely to interact with products than in any other location including the checkout. Our slatwall panel merchandizing system allows retailers to convert existing queue barriers into revenue generating merchandizing fixtures, turning a dead space into a profit center. Browsing in the queue keeps customers occupied making the wait seem shorter which improves the customer experience. 
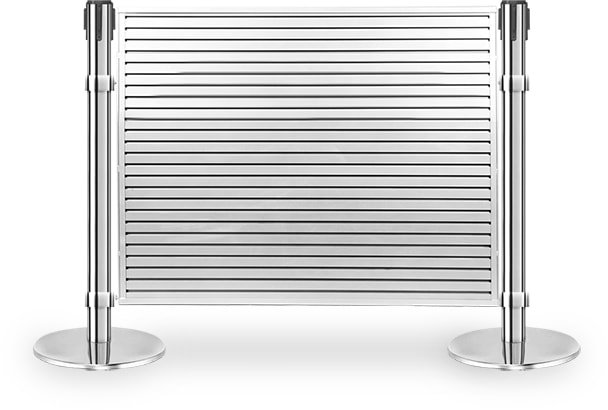
Merchandizing Panel SystemOur Merchandizing Panel System is the only queue based slatwall system that does not require the purchase of new stanchions and works with any brand of belt barrier. The panel's design allows for fast, easy installation without the need to lift heavy panels above the posts. Multiple panels can be connected to create a run of any size. The panel will accept a wide range of slatwall accessories and the posts tops can be fitted with our Display Bowl for increased capacity. Panel Attachment SystemOur unique panel attachment collars allow any existing belt barrier to be fitted with slat wall panels. The collar's one piece design allows fast, simple set up and it's 4 way connectivity means panels can be attached in line and at right angles. Panels are attached at the bottom first so they do not have to be lifted above the post making installation easy for a single person. Standard Slatwall Panel
Aluminum Slatwall panel housed in a steel frame with placement lugs to fit into post collars.
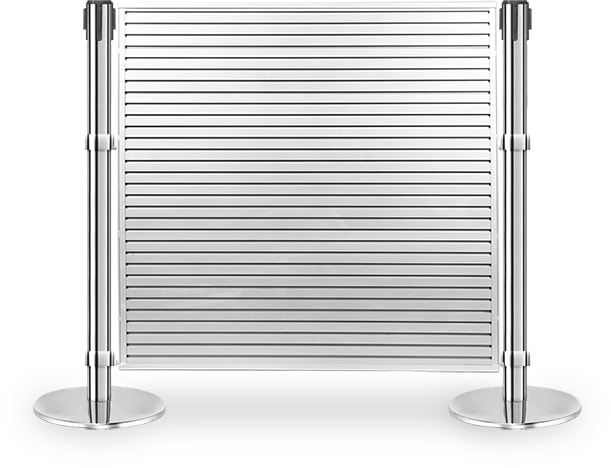
Extra Height Slatwall Panel
48" high Slatwall panel allows greater merchandizing space for the same foot print.
 Small StoreFunctional merchandized queue with minimal footprint 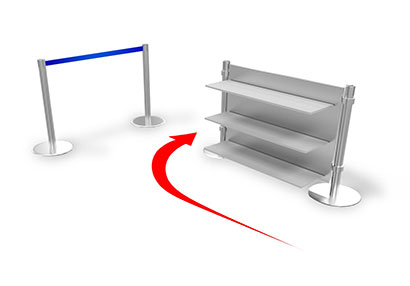
"L" ShapeMid size queue system with "L" footprint 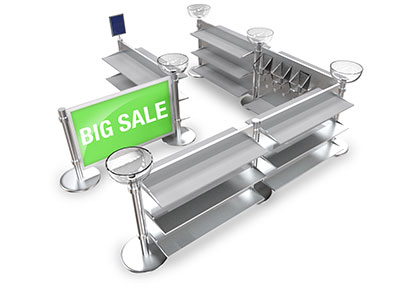
Medium ConfigurationMid size queue system with square footprint 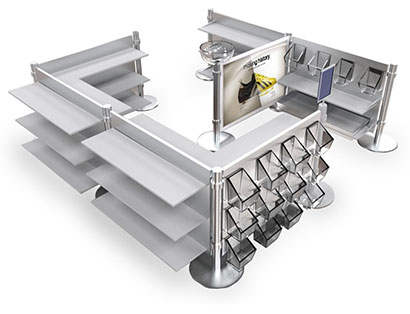
Large ConfigurationHigh capacity fully merchandized queue, can be expanded to any size 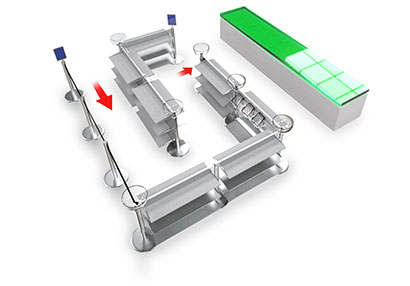
Flexible Configuration Options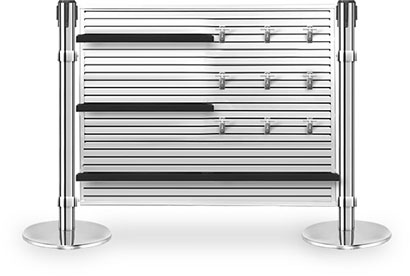
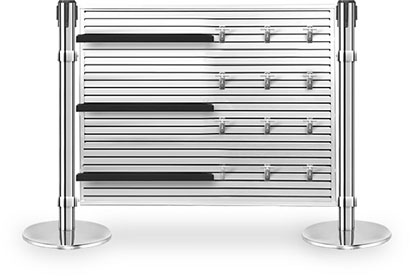
Accessories49" X 9" Metal Shelf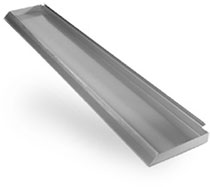
49" X 12" Large Metal Shelf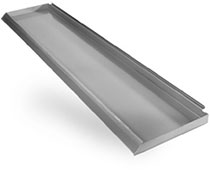
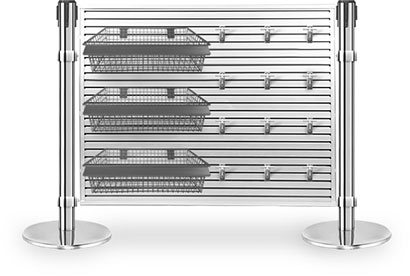
49" X 12" Wire Shelf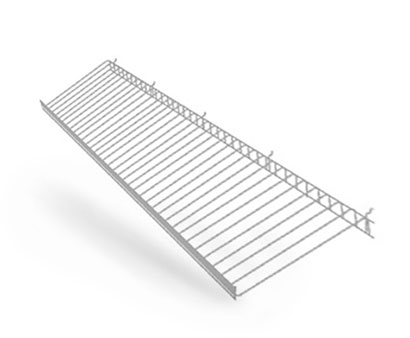
49" X 12" Large Wire Shelf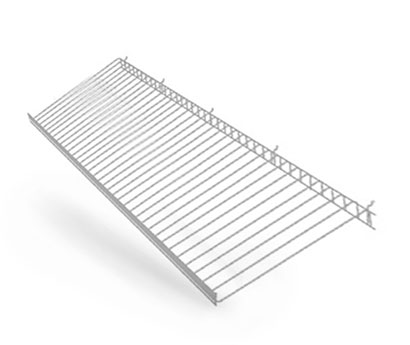
Slant Basket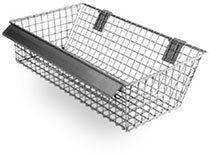
Hook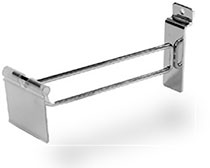
Saddle Tray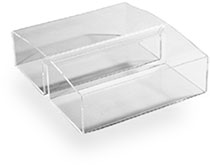
Divided Tray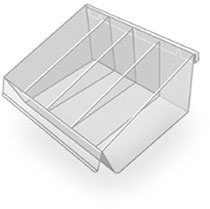
Display Bowl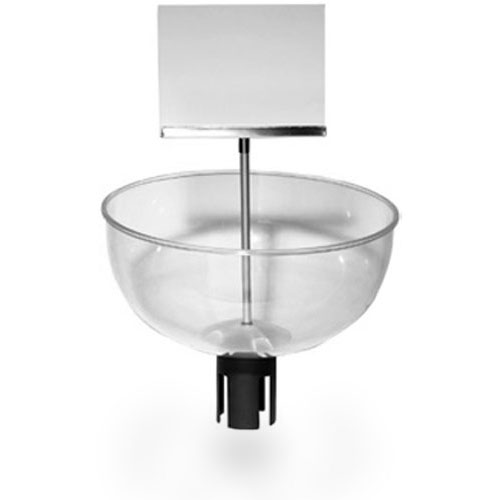
Magazine Holder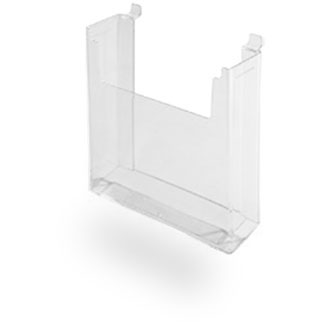
Acrylic Pocket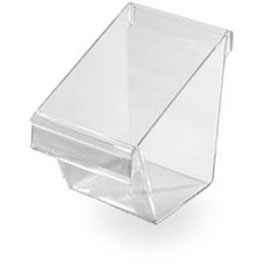
Slatwall Panel Specifications
Queue Line Merchandising Panels & Display BowlsThe Merchandizing panel brings the capacity and versatility of a slatwall fixture to the best impulse buy location in the store, the customer queue. The panel’s frame design allows for fast, easy connection of multiple panels so you can create any size of fixture. The panel will accept a wide range of slatwall accessories including hooks, shelves and baskets and the post tops can be fitted with our Display Bowl for increased capacity. Display BowlImpulse Sales SensationMade from tough, crystal clear polycarbonate, the Display Bowl is an ideal fixture for those small impulse items suited for sale in the checkout line. Fits to the top of the queue barrier; adapters are available to fit all major barrier brands.
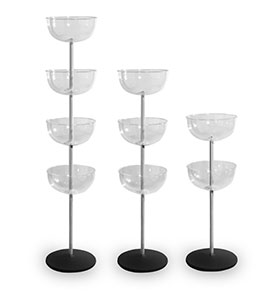
Bowl Tower360° MerchandizingAvailable in 2, 3, and 4 bowl configurations, the Bowl Tower makes the ubiquitous Display Bowl into a standalone fixture. With a minimal 14” footprint and able to be shopped through 360° the Bowl Tower is ideal for use in isles, checkout areas, and other places with limited floor space.
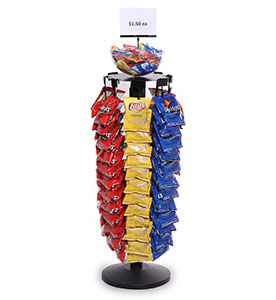
Merchandizing WheelMaximum Post Top MerchandizingThe Merchandizing Wheel can be used as a standalone fixture or in customer queues to generate impulse sales. Fits to the top of a barrier with a capacity of up to 8, 12 station Clips Strips. Fast simple restocking using preloaded Clip Strips. If used as a standalone fixture all 8 positions can be loaded allowing 360° merchandizing.
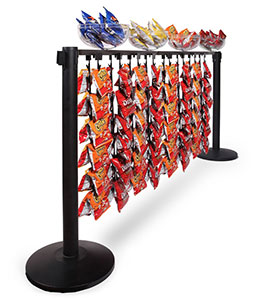
Merchandizing BeamIn Line Clip Strip & BowlsThe Merchandizing Beam attaches to the queue barrier using the barrier’s receiving splines. Available in 4’ and 6’ lengths, the longer unit can accept 10, 12 positon Clips Strip and up to four Display Bowls.
Post Top Merchandizing Specifications
BUY - Order Queue Line Merchandising Panels & Display BowlsGo To Top |
|||||||||||||||||||||||||||||||||||||||||
Lavi Sign Frame |
|||||||||||||||||||||||||||||||||||||||||
Buyer's Guide & FAQ for Lavi Electronic Queuing Line Call System with Station Lights "Qtrac Plug & Play"BUY - Order Lavi Electronic Queuing Systems Here
Decrease wait times, increase throughput, and improve customer experience.What is Qtrac CF?Qtrac CF is a wireless technology that uses digital signage and station lights to streamline the way agents hail customers. How It Works:
Why choose Qtrac CF electronic queuing solution?
FAQ for "Qtrac Plug & Play" - Electronic Queuing System - What is on the screen when all stations are busy and customers are waiting in the line.The standard message on the LCD screen is “Please Wait Here”. If you chose “Custom Setup” when ordering your system, we can customize the screen with your logo or slide show of marketing images. Additionally, you can update the standby images yourself at any time - What if I need to reorganize my stations in the future, add more or reduce the number.The main setup has to be done by our specialists. We will design a new sequence (with the arrows and other custom details) and will send you a USB stick, that you will have to insert in the main computer. The cost is $225. "Qtrac" Station Lights & Numbers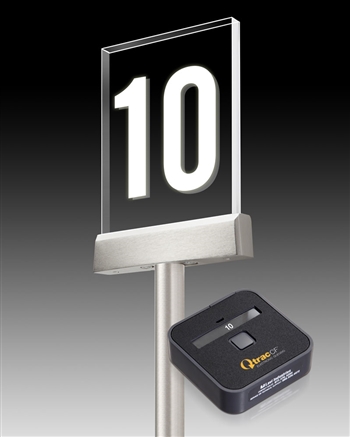 For ordering Station Lights without the Queueing System |
|||||||||||||||||||||||||||||||||||||||||
| Retractable Belt Barriers - Custom Printing Dye Sublimation  Dye Sublimation is a digital process in which the belts are dyed rather than printed so the print won't wear off over time. Unlimited colors and photo realistic graphics are possible. High ink coverage designs will not affect belt retraction or cause flopping. Text, graphics, messages & promotions can be applied to your queue management products with your own unique content design.
Screen Printing  Screen printing is a low cost process suitable for simple designs in one or two colors. As ink is applied to the surface of the belt, it will wear off over time. Not suitable for high ink coverage designs as this may cause the belt to flop and can affect belt retraction .
Lead time: 2 weeks after customer's approval.
Costs: One Time Print Setup Charge: Please contact us for quote. Belt Length Pricing Surcharge: Based on quantity. Please contact us for a quote. • Increase brand exposure to a captive audience • Enhance new or existing queuing spaces ---belts are easily replaced in the field • Expanding the reach of your marketing programs with a unique, high-impact vehicle • Energize your brand and your queue with belts rich in detail, crisp in messaging, and brilliant in color Add the products you want to order to your shopping cart. Contact us to give your description of what you need printed on the belts and if you have specific instructions. We will send you a quote after receiving your order. Only after your approval will your order be processed. Not sure which is the best process for your design? Just send us a copy of your logo or artwork and we'll be pleased to advise you. Please note high-resolution formats are required like .ai or .eps to avoid blurry texts and images. For more information on custom printing call (877) 400-0777 or email [email protected] You can also use our contact form. |
|||||||||||||||||||||||||||||||||||||||||
Cashier Station LightsClearly designate cash registers, agent stations or customer service areas!
We offer 4 types of station lights and 2 standard finishes - Satin or Wrinkle Black SPEC SHEET: Qtrac Station Lights1. Standard Flange Mount Station LightsAvailable in White Panel with any color number or Clear Panel with etched number that illuminates when lit.  USER GUIDE: Installing Qtrac with Post Mount
2. Weighted Base Station Lights
3. Wall Mounted Station Lights (Installation Service Recommended QTPNPCCD)Available in White Panel with any color number or Clear Panel with etched number that illuminates when lit. 
4. Use your own Station Lights with "Wireless Flashing Station Light Controller QTPNPCCD10"Wireless flashing light controller turns station lights on and off automatically. Works with most manufacturer lights and all Lavi lights. You can use your existing station lights by simply adding this controller. 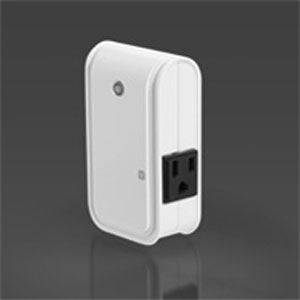
5. Custom Station Lights - for large orders we can make custom station lights, please inquireWe accept and do customized setups according to your queuing needs. This may include using no station lights at all and make use of regular signage to number your cashier stations. |
|||||||||||||||||||||||||||||||||||||||||
Lavi ShuttleTrac Storage and Transport CartsBUY - Order Lavi Industries ShuttleTrac Transport Carts Here
Features & Benefits:Convenient Storage
Durable Construction
Rapid Deployment
ShuttleTrac 9-Post Transporter
ShuttleTrac 18-Post Transport Cart
ShuttleTrac 12-Post Transport Cart
ShuttleTrac 6-Post Add-on Kit
BUY - Order Lavi Industries ShuttleTrac Transport Carts Here |
|||||||||||||||||||||||||||||||||||||||||
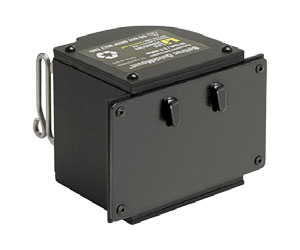
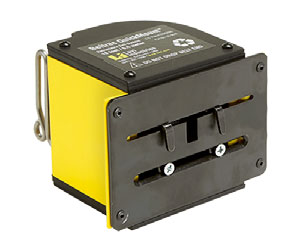
Warehouse Rack Mounted Belt Barriers for Closing Isles at Costco
After many trials, Costco has chosen to use a standard warehouse rack upright mounted retractable belt barrier with an "S" hook belt end made by Lavi Industries. Mounting:
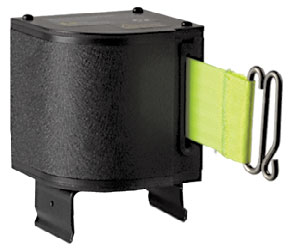
QuickMount® StandardTemporarily attach our Quick Mount Safety Barrier to your warehouse upright by simply clicking into place. For use with uprights with holes measuring 1.5 inches apart. Belt End: "S" Hook Belt Colors:
Belt Lenght: 18' ft. or 24' ft. |
|||||||||||||||||||||||||||||||||||||||||
Belt Length, Colors, Custom Belts (For Lavi Industries Retractable Belt Barriers)Belts are standard 2" wide. There are only 2 options of belt length for the stanchions, 7' ft. and 13' ft. For the wall mounted units, there are 18, 24 and 65' ft. options. The diameter of the post is:
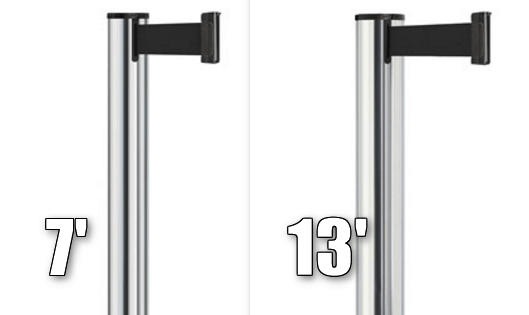
This is important to know if you need to add accessories to the post like a sign frame (the mounting bracket will be different depending on the diameter) or in ordering the replacement belts. When designing your waiting line you have to keep 6" to 12" inches of the belt inside the post. So as if someone will push on the belt it will not pull and flip the post, but it will retract and absorb the change. Standard Belts Colors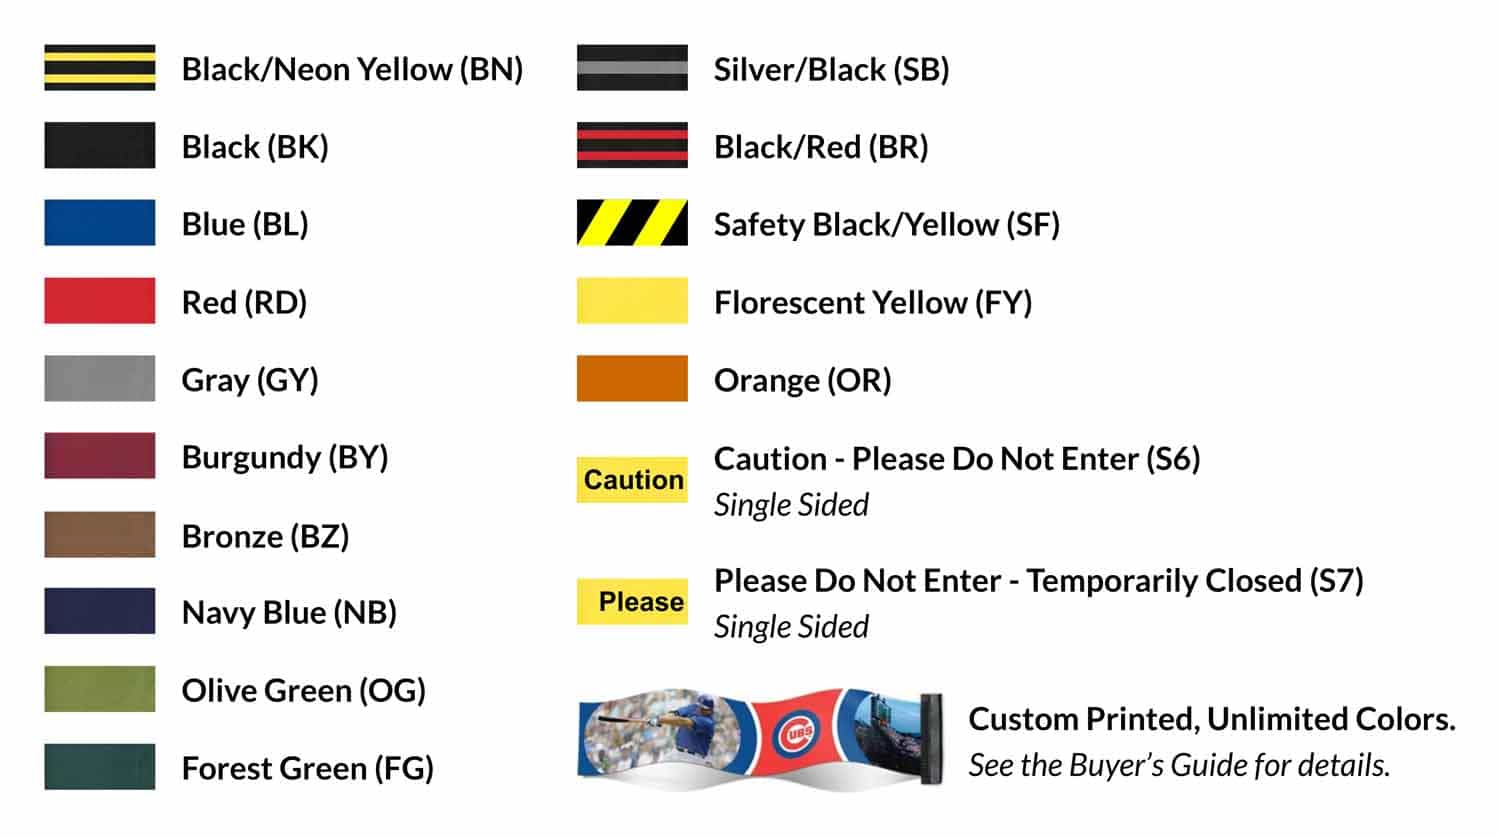
Custom Design Belts (This applies only for Lavi Industries products)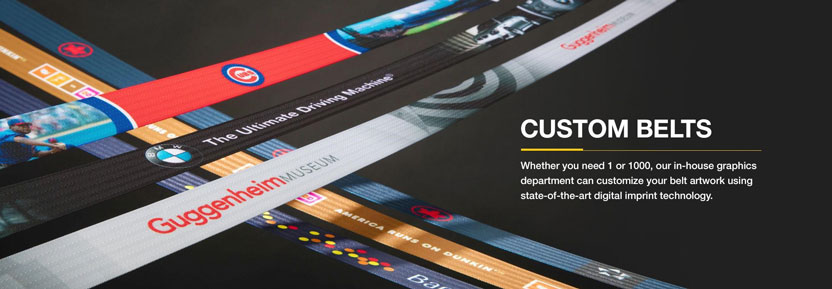
Belts can be printed with your design, Lavi Industries uses a digital process called dye-sub, it prints on both sides of the belt with unlimited number of colors. If you want to order custom printed belts, we will add it to your order manually. The standard lead time is 2 weeks from the time you approve the proof. Pricing: one time setup fee for each unique design is $185 (we keep your design on file, if you want to reorder the same belt next time, the setup fee is $50), plus for each belt printing charge: 7' ft. belt - $17, 13-18' ft. belts - $27. 65' ft. belt for Lavi Jettrac can also be custom printed with your design or any solid color. The setup fee is the same $185, for each belt printing the charge is $125, minimum order is 4 belts. Lead time is 18 business days from receipt of order and approved mock-up.
This is how the process works:
File Format: 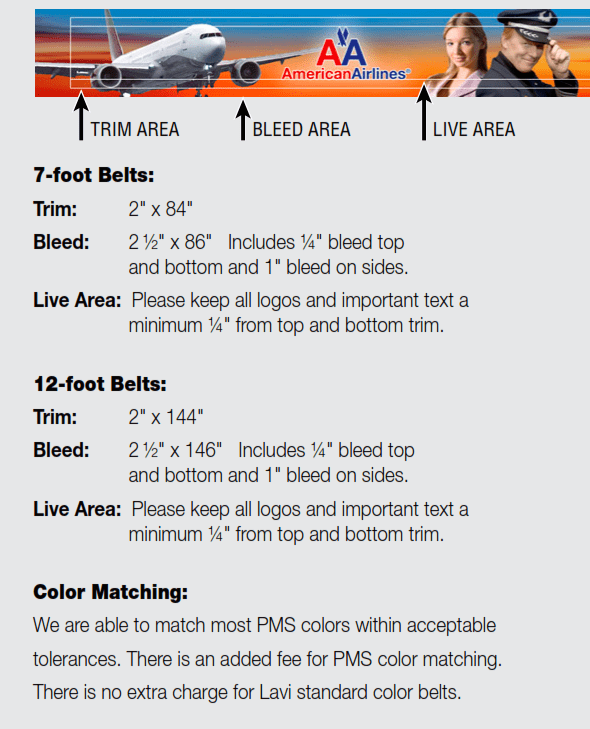
Belt Height: Lavi belt height is 2" inches. Wider belts are available from other brands (3" wide retractable QueuPro Xtra, 6” wide Tensabarrier889PB). |
|||||||||||||||||||||||||||||||||||||||||
Retractable Belt Barrier Buyer's Guides  Lavi Industries Retractable Belt Lavi Industries Retractable Belt  Finishes FinishesThe most popular and practical finish is Black and Satin Aluminum. Notes:
 Custom finish, powder coated Lido tone finish. 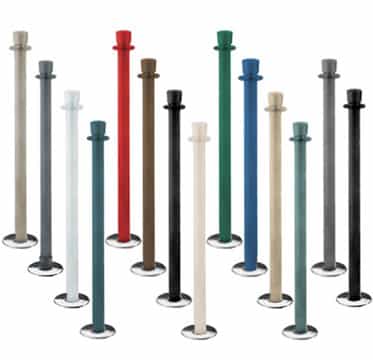 Minimum order is 10 stanchions, additional fees will apply, |
|||||||||||||||||||||||||||||||||||||||||
Buyer's Guide for the Queue Solutions Retractable Belt Barriers |
|||||||||||||||||||||||||||||||||||||||||
Magnetic, Removable and Permanent Stanchion Mounting
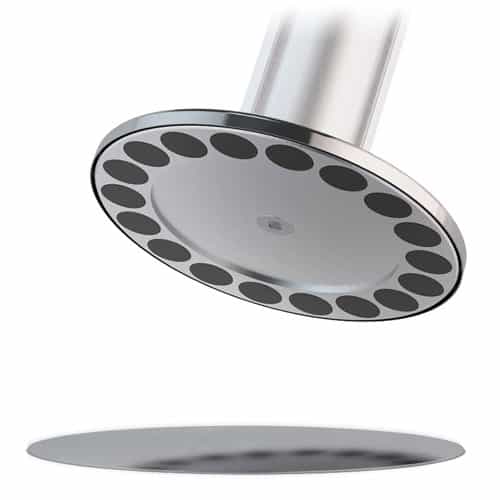
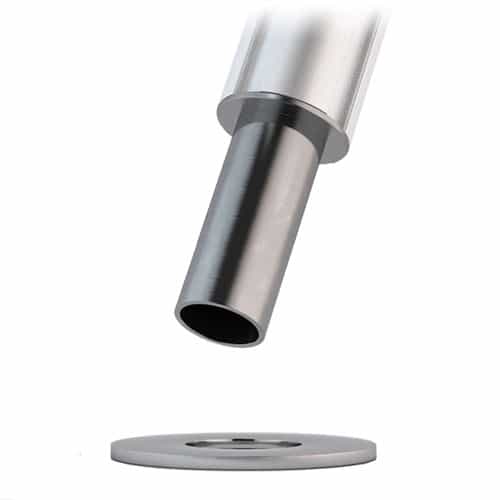
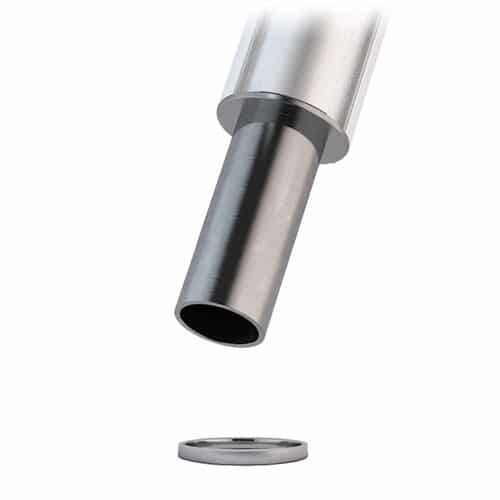
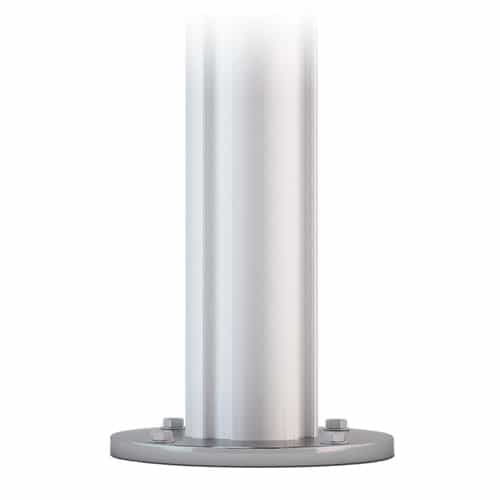
|
|||||||||||||||||||||||||||||||||||||||||
Buyers Guide - Retractable Belt Barriers |
|||||||||||||||||||||||||||||||||||||||||
| Buyers Guide - Classic Velvet Rope Stanchions | |||||||||||||||||||||||||||||||||||||||||
Buyers Guide - Classic Velvet Rope Stanchions |
|||||||||||||||||||||||||||||||||||||||||
| Buyers Guide - Classic Velvet Rope Stanchions | |||||||||||||||||||||||||||||||||||||||||
| Buyers Guide - Classic Velvet Rope Stanchions | |||||||||||||||||||||||||||||||||||||||||
| Sample Default Responsive Article Page | |||||||||||||||||||||||||||||||||||||||||
Sample H1 HeaderPut paragraph Here Put paragraph Here Put paragraph Here Put paragraph Here Put paragraph Here Put paragraph Here Put paragraph Here Put paragraph Here Put paragraph Here Put paragraph Here Put paragraph Here Put paragraph Here Put paragraph Here Put paragraph Here Put paragraph Here Put paragraph Here Put paragraph Here Put paragraph Here Put paragraph Here Put paragraph Here Put paragraph Here. Sample H2 HeaderAt vero eos et accusamus et iusto odio dignissimos ducimus qui blanditiis praesentium voluptatum deleniti atque corrupti quos dolores et quas molestias excepturi sint occaecati cupiditate non provident, similique sunt in culpa qui officia deserunt mollitia animi, id est laborum et dolorum fuga. Et harum quidem rerum facilis est et expedita distinctio. Nam libero tempore, cum soluta nobis est eligendi optio cumque nihil impedit quo minus id quod maxime placeat facere possimus, omnis voluptas assumenda est, omnis dolor repellendus. |
|||||||||||||||||||||||||||||||||||||||||
| How do I buy/redeem a gift certificate? | |||||||||||||||||||||||||||||||||||||||||
| To purchase a gift certificate for someone, click here. If you are the recipient of a gift certificate and would like to redeem your gift certificate, click here. | |||||||||||||||||||||||||||||||||||||||||
| How do I find my product? | |||||||||||||||||||||||||||||||||||||||||
| To find the product(s) you're looking for, you may (1) use the navigation menus on the top, left & bottom of our website. (2) type a keyword into the SEARCH box. If you have any trouble locating a product, feel free to contact customer service for assistance. | |||||||||||||||||||||||||||||||||||||||||
| How do I navigate the site? | |||||||||||||||||||||||||||||||||||||||||
| To navigate this website, simply click on a category you might be interested in. Categories are located on the top, left & bottom of our website. QUICK TIP: Place your mouse cursor over anything you think could be a clickable link. You'll notice that anytime you scroll over something that is a link, your mouse cursor will become a "hand". Whereas scrolling over anything that is NOT a link will leave your cursor as an "arrow". You may also type a keyword into the SEARCH box to quickly find a specific product. If you have any trouble locating a product, feel free to contact customer service for assistance. | |||||||||||||||||||||||||||||||||||||||||
| How do I use a coupon? | |||||||||||||||||||||||||||||||||||||||||
| After adding items to your cart, click the "View Cart" link at the top of this site to view your cart. At the bottom of the shopping cart you'll see a box where you may enter your coupon code. | |||||||||||||||||||||||||||||||||||||||||

